21 Mart 2013 Perşembe

Our Stay at The Four Seasons Westlake Village

To contact us Click HERE
four seasons6

This is a view of their gorgeous falls in the courtyard from the resort’s restaurant. I wish this were the view I had to my backyard =).

four seasons restaurant view

We just returned home from out stay at The Four Seasons in Westlake Village, California and I’m totally wishing I were still at that beautiful resort.

25 Şubat 2013 Pazartesi

Goode's Pecan Pie Recipe- best pecan pie EVER!

To contact us Click HERE

This will be your one and only pecan pie recipe you need! It is delicious and moist and has a the best flavor..... it has a secret ingredient that makes it just the best pecan pie you've ever had- EVER! If you have never had a Goode's pecan pie, you really haven't had pecan pie.... yea it's that "goode". I'm a huge fan of pecan pie and fell in love with the first bite. Now you can too

So the secret ingredient is- Drum roll please..... vinegar. I don't know what it does, but it makes it perfectly sweet! Wait no longer here is the recipe for the world renown Goode's pecan pie. This pie is simply delicious and just in time to make for your thanksgiving dinner. We are starting to make our pies in just 2 days!!! We also have a fool proof {15 minutes from start to finish} pie crust recipe.

 Goode's Pecan Pie Recipe

3 eggs, beaten
3/4 cup sugar
3/4 cup white karo
3 tblsp melted butter
1 tsp vanilla
1 tsp white vinegar
1/8 tsp salt
1 cup chopped pecans

Mix all ingredients thoroughly, except the pecans. Add the pecans and pour in the mixture into a unbaked pie shell. Preheat oven to 375 and bake for 25-30 minutes. Testing for doneness with a knife inserted in the center. Pie is done when knife comes out clean.

****Note: I had Goode's pie over a year ago and recently went back to Houston last month and had their pecan pie again. There pie is quite gooey in the center, but not runny and is still done. If you want a firmer filling center {like typical pecan pies} you will want to cook yours for 45-50 minutes.

Happy Baking!

{Real Parties} Little Man Party: Donovan's 1st Birthday

To contact us Click HERE

I had such a fun time designing this party. I had the opportunity to with an old roommate from years ago to design a Little Man 1st Birthday party for their sweet little Donovan! You can purchase the printables in our shop. A little man party is filled with mustaches and bow ties. One of my favorite items I designed were the bow ties that can be placed on cupcakes, favors, cakes and suckers!

There are 6 different cupcake topper designs and bow tie designs with 2 sizes of bow ties in our printable party collection.

We kept the desserts simple and fabulous! We had cupcakes, chocolate candy bars, candied popcorn, chocolate chip cookies, cake pops, cheesecake pops and a smash cake for Donovan's 1st birthday. For the drinks we had a "Mustache bar" chocolate milk, milk and lemonade. 

Please excuse some of the photos....the lighting was really poor, so some of the photos are a little darker than I hoped for.


All of the items in our Little Man collection available here

6 candy bar wrapper designs in our  little man collection


We gave little bags with 2 chocolate chip cookies (I added and blue and green white chocolate chunks too.... made them really good!) with our thank tag for the favors. 


Thank you from the little Man tags


Green Candied popcorn with our little man favor toppers


Our Cupcake toppers and mini bow ties! I feel like the bow ties really finish the cupcake and makes each one extra special.


Blue pops were cake pops and green were cheesecake pops, both topped with our 2" party tags


Our Little man smash cake.... I had a blast make this little cake. An ombre cake is really easy and fun to make tooDress up your little man cake with mini chocolate mustaches! 
 
It is such a easy way to dress up a cake.... Simply layout a piece of wax paper and I just freehanded rows of little curls. 


The kids went absolutely crazy for these mini chocolate mustaches on the smash cake. They were all eaten off before Donovan could smash the cake;)


A little drink of milk between bites


For drinks we had a "Milk Stache" Bar 


 "Wet your Whiskers Water" 


We played pin the mustache on Donovan!


Everyone had mustaches


With the left over cake from the smash cake we had a little food fight!


This little guy didn't like it so much in his face. 

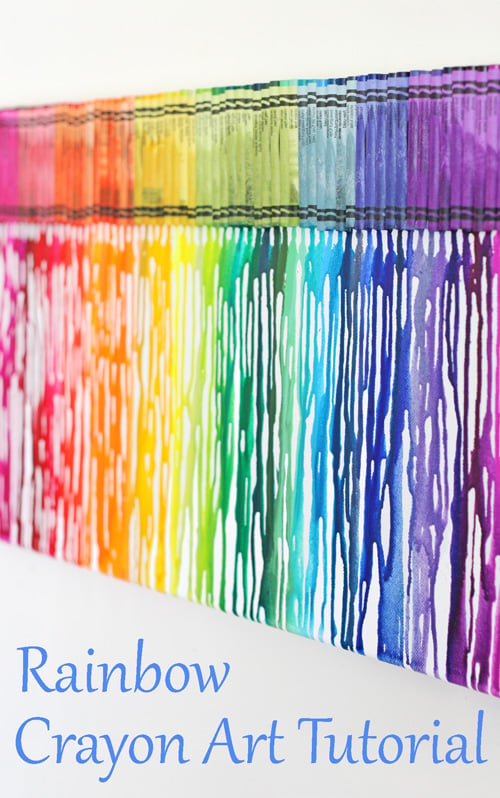
How To Make Melted Rainbow Crayon Art

To contact us Click HERE

The best rainbow melted crayon art tutorial

A few weeks before my daughter’s Rainbow Art Birthday Party, I prepared a set of three melted crayon canvases to act as the backdrop for the dessert/snack table.  There is always something so pretty and cheerful about rainbow colors!  I loved the way the canvases brought color to the table, and pulled in the art theme.

I’ve seen lots of rainbow crayon art circulating around the internet for quite some time, but this is the first time I’ve given it a try.  It’s a really fun and rewarding project!

For less than the cost of a framed print to hang on a wall, you can create a custom work of art, adjusting the size and colors to your liking.  The total cost of this project for me was about $35.00.  That includes the canvas ($15), heat gun ($12, using a coupon), and crayons ($7).  I am not counting the cost of the glue gun, since I already owned one, and most of you likely do as well.

Here’s how to make one…
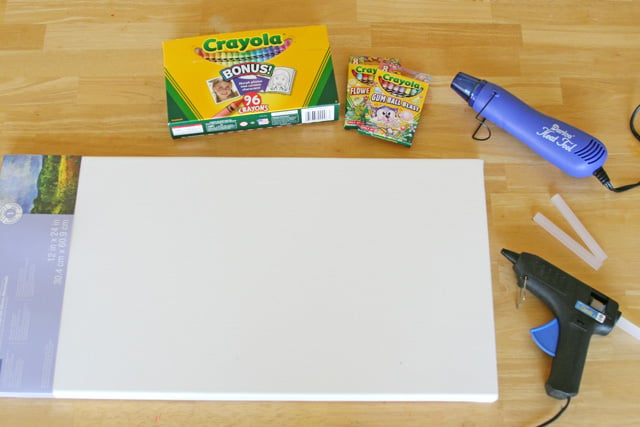
Gather your supplies…

You’ll need a canvas (the one shown is 24″x12″)

a hot glue gun (and extra glue)

crayons (for this 24″ wide canvas I used most of the colors from a 96 crayon pack, as well as two 8 crayon packs- buy more than you think you’ll need)

a heat gun (available from most craft stores, sold near stamping supplies, or gift wrap/cellophane)
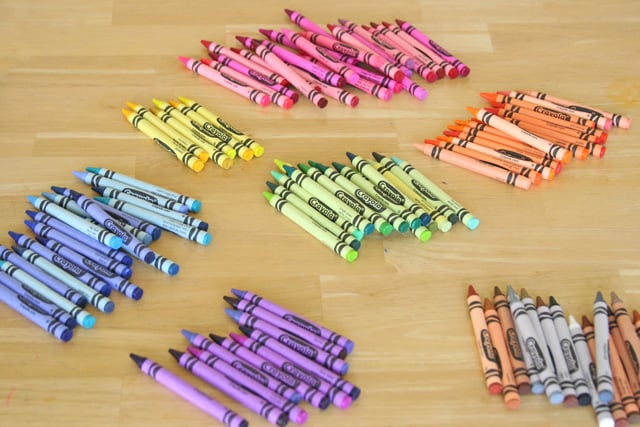
Step 1-  Quickly sort the crayons by color.  You will likely not want to include any browns, black or grey.
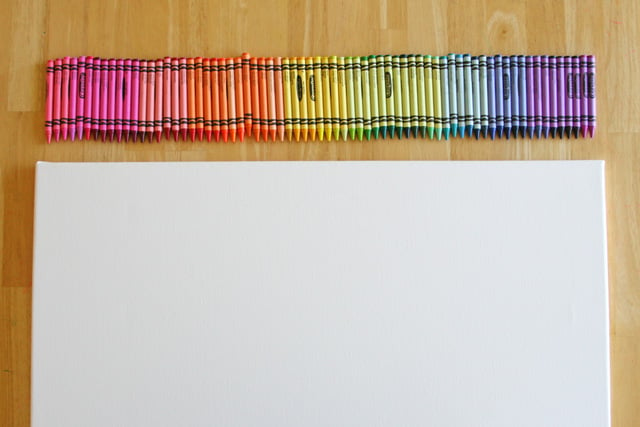
making rainbow melted crayon art

Step 2-  Line up the crayons by color, then fine tune the exact order you’d like the different shades.   Line up the crayons next to the canvas, so you know exactly how many you’ll need to fit the length of the canvas.
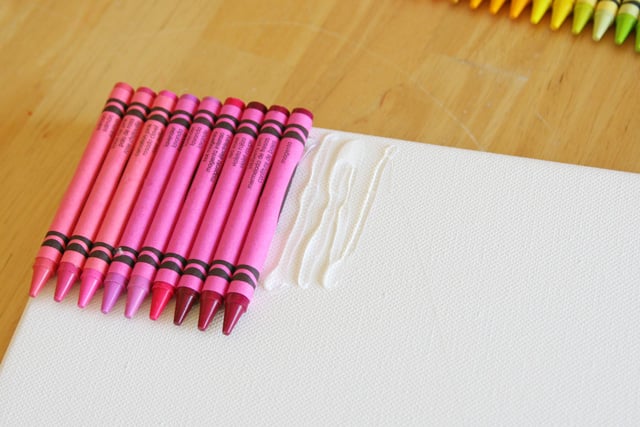
Step 3- Begin hot gluing the crayons to the canvas.  I chose to lay the crayons so the name of the color was showing.  Apply enough glue to attach 3 or 4 crayons, lay those crayons down, then add more glue, and so on.
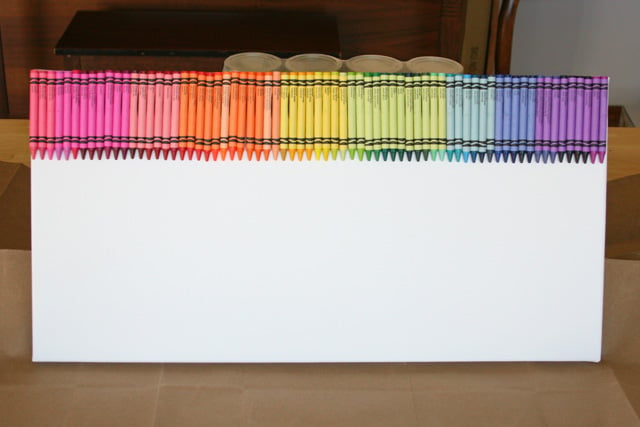
Step 4-  Once all the crayons are glued on, cover your work area with paper, and lean the canvas up against a support (such as a case of canning jars)  =)
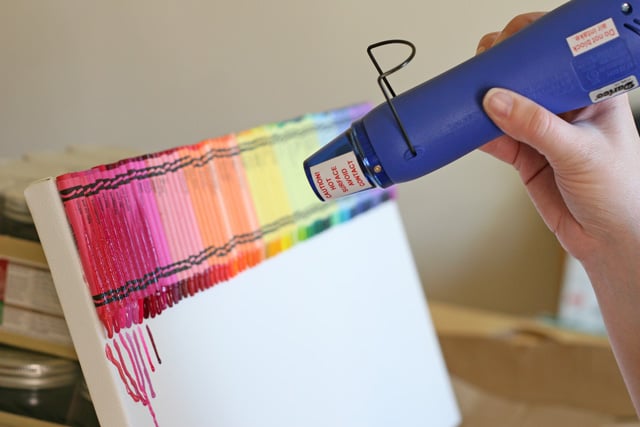
Step 5-  Begin heating one section of the crayons with the heat gun.  Hold the gun about 12 inches from the crayons.  It will take a couple minutes for the crayons to begin to melt.

*A note about using a heat gun vs. a blow dryer.  I have seen melted crayon projects using a blow dryer, but it is much more difficult to control the direction of the melted wax.  With a blow dryer the wax tends to fly in all directions, not just drip down.   A heat gun produces hotter heat, and blows the air with less force.  Using a heat gun (instead of a blow dryer) seems to cut down the total time of the melting process by at least half.  As is, it will take 45 minutes or so to melt the crayons (using a canvas of similar size).  I think attempting this project with a blow dryer would be quite frustrating.  As always, feel free to experiment… I’m just sharing my recommendations.
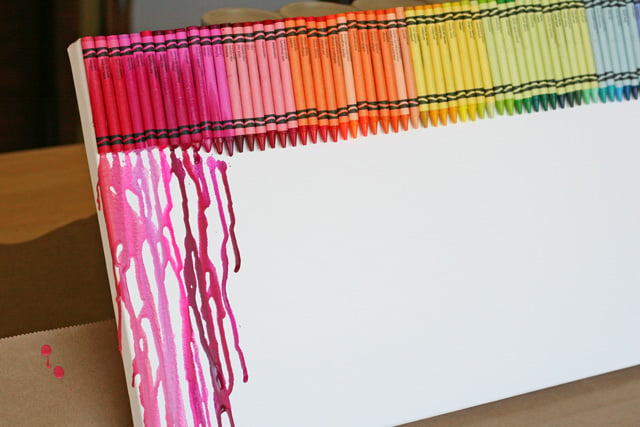
Step 6-  Continue directing heat at a section of crayons, and use the air and heat as needed to direct the wax down the canvas.
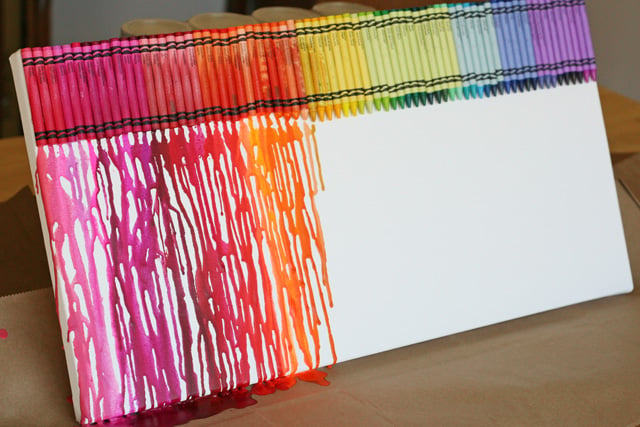
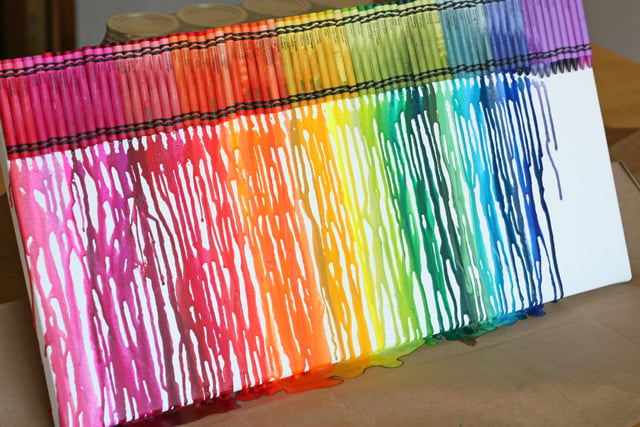
 

Step 7-  Continue working a section at a time.  The total time for melting the crayons on this canvas (24″ wide) was about 45 minutes.
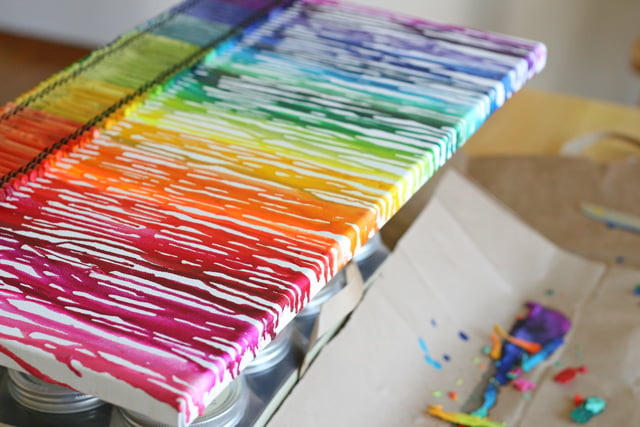
Step 8-  When all the crayons have melted, and dripped down, pick up the canvas from your work area.  Scrape off any excess wax from along the bottom edge of the canvas, then use the heat gun as needed to melt the wax along the edge of the canvas.
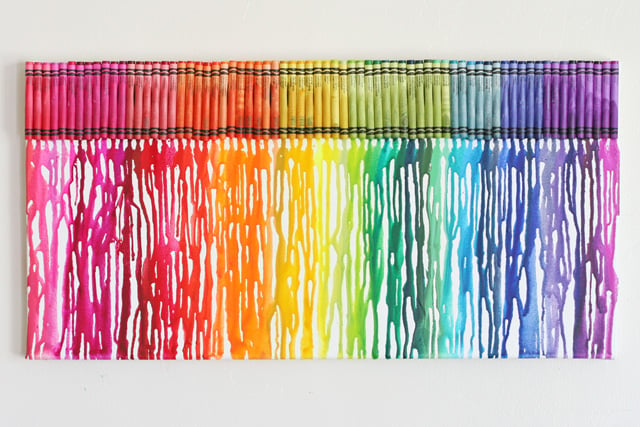
How to make melted rainbow crayon art

Step 9-  Project is complete!   Admire the beautiful art you just created  =)

This project was a perfect addition to my daughter’s Rainbow Art Birthday Party, and would make a beautiful piece to hang in a child’s room, class room, or any place that could use a beautiful pop of color!